Table of Contents
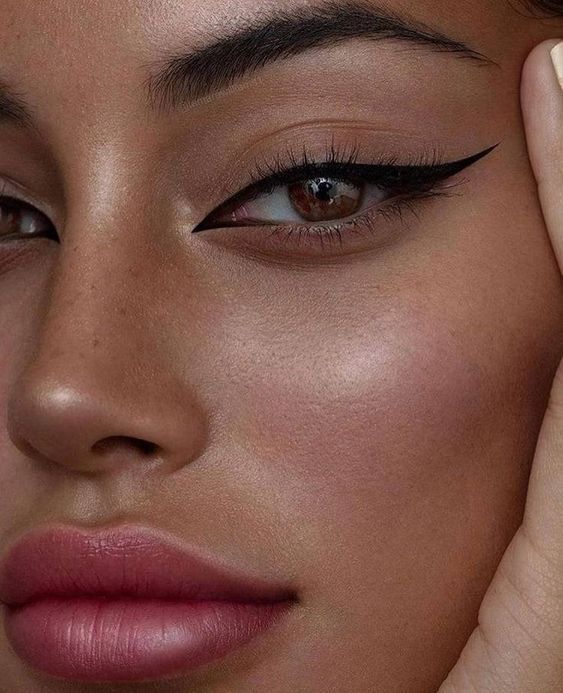
You know those amazing winged eyeliner looks that celebs like Ariana Grande, Adele, and Lauren Conrad rock? Well, you can totally pull off that sleek and fabulous style too! Imagine winged eyeliner as that forever cool thing that never goes out of style—it’s like a classic that just keeps getting cooler. We all adore it because it can totally up your makeup game or even steal the spotlight on its own.
It gives your makeup a little something extra, makes your eyes pop, and you can try it in lots of fun ways. The coolest part? It goes with pretty much any makeup look you can dream up. If you’re anything like me, always aiming for that perfect winged eyeliner but finding it a bit tricky, here’s a super easy guide with 5 steps to help you nail it every single time!

Unleash Your Inner Artist: Choosing the Perfect Eyeliner Brush!
Let’s talk about eye makeup and how to make your eyeliner look great. Imagine you’re an artist creating a cool painting, but on your eyelids. Imagine you’re an artist with a paintbrush, right? Well, creating a beautiful eye look is kind of like that. But instead of a paintbrush, you need the perfect tools. Let’s dive into the fun part – getting the scoop on what you need!
Step 1: Tool Talk
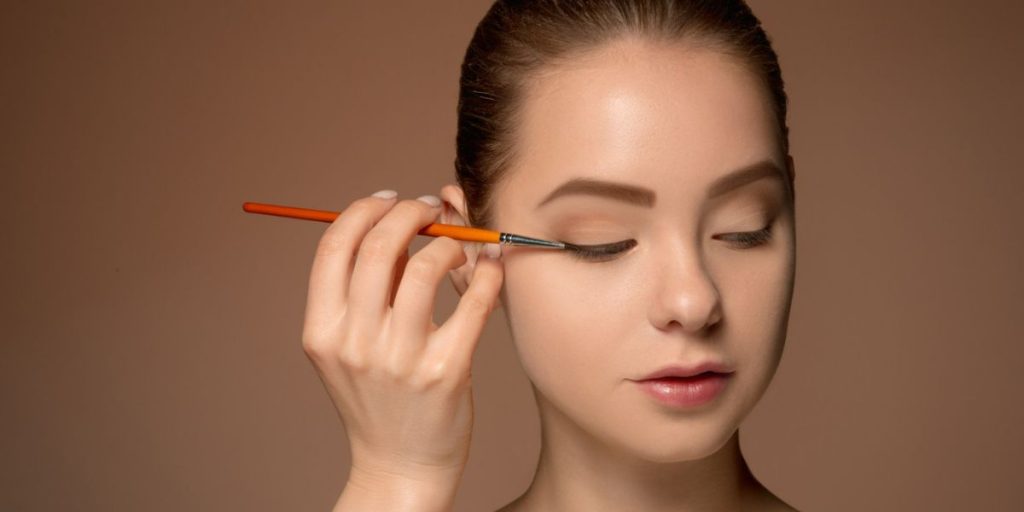
Your tools are like the unsung heroes of your makeup routine. It’s not just about the eyeliner itself; the brush you use plays a crucial role. We’re talking about that magical angled eyeliner brush that can make all the difference. But not just any brush – go for one that’s angled and thin.
Why angled? Well, an angled brush provides you with the precision you need for those sharp, killer wings. Imagine you have a super cool tool just for your eyes. This awesome little brush is so thin that it helps you make neat and clear lines. With this, you can totally control how you want your eyes to look. It’s like magic for your makeup game!
Step 2: Choosing the Perfect Brush
Now, I get it – the makeup aisle can be overwhelming with its array of brushes. That’s why taking a bit of time to find your ideal eyeliner brush is crucial. It’s like choosing the perfect tool for an artist – different strokes for different folks, or in this case, different brushes for different eyes.
To make an informed decision, dive into reviews. What are people saying about the brushes they’ve tried? Any hidden gems or brushes to avoid? Take notes, because this is your personal research project to find the unsung hero of your makeup bag.
Next up, hit up YouTube! Beauty gurus are like your makeup mentors, offering tips, tricks, and, most importantly, reviews. Watch a few tutorials, see which brushes these experts swear by, and notice the ones they keep reaching for. It’s like getting advice from a friend who’s been there, done that.

Step 3: Your Personal Pick
Now that you’ve looked around, it’s decision time! Think about what you like. Do you want something easy, or are you okay with a bit of a challenge for that extra cool factor? Your perfect brush is waiting for you; you just have to find it.
Think of it like finding your signature tool in an artist’s kit – that one brush that feels like an extension of your hand. Take your time, try a few options, and trust your instincts. This is your makeup journey, and the right brush is your sidekick in creating eye looks that make heads turn.
Find the Perfect Eyeliner
Now, let’s talk about choosing the right eyeliner. It’s like picking your favorite color! There are different types: eye pencils, kajals, gel eyeliners, and liquid eyeliners.
First up, eye pencils and kajals are super easy to use. They’re like drawing with a crayon – smooth and no mess. Just be careful if the pencil gets too dull; you might end up with thicker lines than you planned!
Next, there are gel eyeliners. They’re creamy like pencils but can be a bit tricky. Don’t scoop up too much with your brush, or things might get messy.
Last but not least, we have liquid eyeliners. These are a bit challenging, like mastering a tricky dance move. One tiny mistake, and you might end up with smudges. But, once you get the hang of it, it’s pretty awesome!
Oh, and don’t forget about colors! If your eyes are light, try experimenting with different shades. For a bold, dramatic look, go for a black eyeliner. It’s like choosing the perfect outfit for your eyes!
Let’s Dive Into Creating Your Perfect Winged Eyeliner Look
Alright, it’s time to master the art of applying winged eyeliner! Grab your trusty eyeliner and a fine brush to get started. First things first, dip your brush into the eyeliner. But here’s the key: be mindful not to load up too much product on the brush. If you go overboard, there’s a risk of it spreading all over the place, and we definitely don’t want that.
When you have enough makeup on your brush, let’s make it perfect. Just lightly wipe off the extra on the back of your hand. This not only keeps the amount in check but also makes sure your brush is just the right size to make a neat and sharp line.
Now, let’s start drawing that fabulous wing! Begin from the outer corner of your eye, extending the line towards the end of your eyebrow. Picture an imaginary line at about a 20-30 degree angle. The key here is to keep it short and sweet. A shorter line provides more control and is generally easier to manage.
Oh, and here’s a pro tip: try your best to replicate the same angle on the other eye. It might take a bit of practice to get them perfectly symmetrical, but that’s part of the fun! Embrace the learning process.
Remember, less is more, especially when it comes to winged eyeliner. It’s way easier to add a little extra later if needed than to deal with the hassle of removing excess. So, take your time, enjoy the process, and let those wings soar! Your eyes are about to steal the show!
Building and Filling for a Stunning Look
Now that we’ve laid the groundwork with our initial eyeliner application. This is where we get to add some drama and flair to your eyes. Grab your trusty brush and dip it back into that fantastic eyeliner.
Start by bringing the liner inward from the outer corners of your eyes. This is where the magic begins. Instead of just following the natural shape of your eye, let’s create a captivating effect. Pull the liner towards the middle, forming a triangular shape at the outer corners. Think of it like connecting an imaginary line from the outer edge towards the center of your eyelid.
Now, here’s where your creativity can shine. Fill in that triangular space you’ve just outlined. This creates a sleek and defined winged look. If you’re in the mood for a more dramatic appearance, feel free to add more liner to the triangle. This will make the wing thicker and, if you wish, extend it for an even more striking effect.
Experiment with the length and thickness until you achieve the desired look. Remember, makeup is all about self-expression, so there are no hard and fast rules. It’s your canvas, and you’re the artist!
But what if you’re feeling a bit adventurous and want to take that liner all the way to the inner corner of your eye? No problem! Just keep in mind to maintain a thicker application on the outer portion. This technique not only defines your eyes but also enhances their shape, giving you a bold and alluring gaze.
Perfecting Your Look with the Clean Up Technique
Let’s dive a bit deeper into the fifth step of your makeup routine: the Clean Up phase. As we discussed earlier, it’s a smart move to start with a modest amount of eyeliner and then gradually build up if needed. This approach makes it simpler to enhance your look by adding more, rather than dealing with the challenge of reducing excess makeup.
However, we’re all human, and sometimes our artistic endeavors with eyeliner may result in lines that are a bit thicker or bolder than initially intended. Fear not, my friend! This is where the magic of corrective action comes into play.
Picture this scenario: you’ve perfected one eye, and then the other eye decides to dance to its own rhythm, resulting in asymmetry that’s not quite Instagram-worthy. Here’s the remedy, and it involves a humble Q-tip or a delicate eyeliner brush. These tools are your trusty companions in the quest for a flawless finish.
Now, the key is not to panic but to gracefully handle the situation. Take your chosen tool—be it the Q-tip or the brush—and dip it gently into some makeup remover. The goal here is not to saturate it but to ensure there’s enough product to address those minor mishaps.
With your remover-dipped sidekick in hand, delicately clean away any unintended eyeliner adventures. Precision is your friend in this process. Ensure that you’re targeting the specific areas that need correction, leaving the rest of your beautifully applied makeup untouched.
Imagine you have this magical tiny eraser for your makeup, saving the day when things go a bit messy. It’s like giving your masterpiece a touch-up without having to redo everything. The coolest part? It’s super fast, so you can go back to being an eyeliner pro in a jiffy!
Remember, the Clean Up step is not a sign of defeat but a testament to your makeup artistry journey. Embrace it, refine it, and continue on your quest for the perfect eyeliner look. Happy beautifying!
Conclusion
Mastering the perfect winged eyeliner is an art form that involves choosing the right tools, finding the perfect eyeliner, and skillfully applying and refining the look. Your eyeliner brush is your secret weapon, and its precision can make all the difference in creating sharp, killer wings. Take the time to research and choose the perfect brush that feels like an extension of your hand, just like an artist selecting their signature tool.
Let’s talk about eyeliner! Ever tried those cool eye makeup things like pencils, gels, and liquids? They’re awesome for making your eyes look super fancy. The fun part is experimenting with them to find your absolute favorite. And hey, colors are a game-changer – they can make your eyes stand out big time! Give it a go! Feel free to have fun with different shades.
Let’s talk about making your eyes look awesome with winged eyeliner. You only need a bit of your favorite eyeliner – not too much. And you know what? It’s really simple! Patience is super important here. So, take your time and enjoy the process of making your eyes look amazing! Embrace the learning process, and soon your eyes will steal the show.
Building and filling in your eyeliner look is where the drama and flair come into play. Create a captivating effect by extending the liner towards the middle, forming a triangular shape at the outer corners. This technique allows for self-expression, so feel free to adjust the length and thickness until you achieve your desired look. The inner corner can also be part of the adventure, just ensure a thicker application on the outer portion for a bold and alluring gaze.
Finally, the clean-up technique is your ally in achieving a flawless finish. Don’t panic if lines are thicker than intended; gracefully use a Q-tip or a delicate eyeliner brush with makeup remover to refine your masterpiece. The clean-up step is not a sign of defeat but a testament to your makeup artistry journey. Embrace it, refine it, and continue on your quest for the perfect winged eyeliner look. Happy beautifying!


